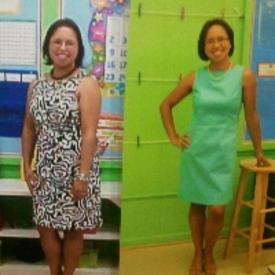
Creating side by side photos

ka_42
Posts: 720 Member
How do you do side by side photos? I tried using paint with no luck! I want to show my before and after progress.
Thanks for your help, pals! :flowerforyou:
Thanks for your help, pals! :flowerforyou:
0
Replies
-
Open up Paint. The go to the folder on your computer with your photos on it. Double click your 'before' shot so that you're viewing it in larger form.
Search your keyboard for a button with the word "PRTSC" or another shortened version of the word Printscreen. It takes a snapshot of what is on your screen then.
Go back to Paint and click paste from the drop-down menu at the top. An image of your entire screen will appear. Click the "Select" tool and pick out the area of your photo. Then, click copy. Go to the drop-down menu and click undo untill you're back to plain white. Then click paste again. An image of your photo will appear on its own. Move it to the far left.
Repeat the process all over with your second photo, but when undoing (to get rid of the big image of your screen) only go as far back as your first photo, rather than undoing the whole thing.
If it sounds too fiddly, I could do it for you if you like. 0
0 -
I like photobucket myself...make a collage (sp)...try the paint first if it doesn't work message me and I'll do step by step instructions for photobucket for you0
-
you girls are wonderful! I have a photobucket account so I think I'm going to try that route! Thanks SO much!0
-
Here are a few other options for folks who don't have access to Photoshop but need to make comps:
http://www.picnik.com
http://www.photoshop.com/tools?wf=editor
http://pixlr.com
http://fotoflexer.com0 -
bump0
-
Bump.
 I always wondered how people do that! 0
 -
Ditto, bump.
Hope to do before and after in the next 6 months or so.0 -
bump, can't wait until I can share my success story!0
-
bump, can't wait to share mine!0
-
BUMP
cant wait to see more success stories0 -
Bump Can't wait to do mine
 0
0 -
Your photo's turned out good. I'll be doing it someday!0
-
Bump0
-
Glad I asked a helpful question! I used photobucket.com and it worked perfectly! All you have to do is upload your photos and then make a "collage". You can chose to put two+ photos side by side. See my profile for the two I created!0
-
bump0
-
Actually it is really simple and you probably already have the program. I used Microsoft PowerPoint When you save it, click SAVE AS, then click OTHER FORMATS When the dialog box opens change the "save as type" from POWERPOINT PRESENTATION to JPEG. It will ask you if you want to save every slide as a picture or just the current slide Then just upload it where you want and post it to any site.

You can see side-by-side pics on my blog (I've also posted them on here before).
newmeat30.blogspot.com0 -
1. go to paint, open newest picture, resize to about 300-400 pixels in height then press CTRL+A, then CTRL+C
2. open second picture-your old one, "resize" to about same as first pixels in height,
3. then on the left you will see a tiny little square in the dead center, drag that to the right almost to then end of the screen.
4. CTRL+V to paste the other pic, then drag it to the side of the old pic.
5. Click that little square in the middle on the right again, drag it to meet the edge of the picture on the right.
6.OPTIONAL: use the text tool to write your starting weight on the first pic, and current on the other.
7. File>Save As: Name your file, save it as a JPG in a location you can find it, like on your desktop or in "My pictures"
8. Upload to photobucket.
:flowerforyou:
I could make screen shots if you'd like...
Personally, I prefer photoshop. 0
0 -
bump
 0
0 -
There's also a free program called GIMP; do a google search for that or "GNU image manipulation program." Kind of a bare-bones Photochop, but without the $xxx price tag, but it gets the job done. You have to open a new image, drag in the photos you want, and crop it down to whatever your desired size, but it's pretty handy if you have the spare time to pick it up and search tutorials and how-tos.0
-
Bump for later.0
This discussion has been closed.
Categories
- All Categories
- 1.4M Health, Wellness and Goals
- 397.1K Introduce Yourself
- 44.2K Getting Started
- 260.9K Health and Weight Loss
- 176.3K Food and Nutrition
- 47.6K Recipes
- 232.8K Fitness and Exercise
- 456 Sleep, Mindfulness and Overall Wellness
- 6.5K Goal: Maintaining Weight
- 8.7K Goal: Gaining Weight and Body Building
- 153.4K Motivation and Support
- 8.3K Challenges
- 1.3K Debate Club
- 96.5K Chit-Chat
- 2.6K Fun and Games
- 4.6K MyFitnessPal Information
- 16 News and Announcements
- 18 MyFitnessPal Academy
- 1.4K Feature Suggestions and Ideas
- 3.1K MyFitnessPal Tech Support Questions
Do you Love MyFitnessPal? Have you crushed a goal or improved your life through better nutrition using MyFitnessPal?
Share your success and inspire others. Leave us a review on Apple Or Google Play stores!
Share your success and inspire others. Leave us a review on Apple Or Google Play stores!


