Cheap Raised Garden for a Small Yard
Options

Elizabeth_C34
Posts: 6,375 Member
Hi all! I just got done building my first raised vegetable garden and thought I'd share.
We have a small 1/4 acre back yard, and I really wanted to plant some veggies for the two of us to use, so I got the idea off the interwebz to build a raised vegetable garden instead of tilling up the thick clay dirt in our back yard.
For this project, I used:
1. A board of 2x12x16 pressure treated wood (cedar is great too but hard to find in some areas) cut into four 4-foot long lengths. Home depot did this for me so I didn't have to saw much except a small piece off the end. Be sure to check that the pressure treated wood does not contain copper arsenate (arsenic). Some woods still are treated with this, but most are not. Be sure to check if you're not sure.
2. Sixteen 3" EXTERIOR wood screws. Make sure they are EXTERIOR screws as interior ones will rust over time.
3. Weedblock fabric weed blocker
4. Eight weedblock stakes. Any flat tipped stake will do just fine also to hold the weedblock fabric taut and flat.
5. Strong electric screwdriver or drill with appropriately sized bit for the screws you buy. Drilling through thick pressure treated wood is not for a flimsy screwdriver so make sure you have a powerful enough one for the job.
6. Sixteen cubic feet of top soil (sixteen 1 cubic foot bags).
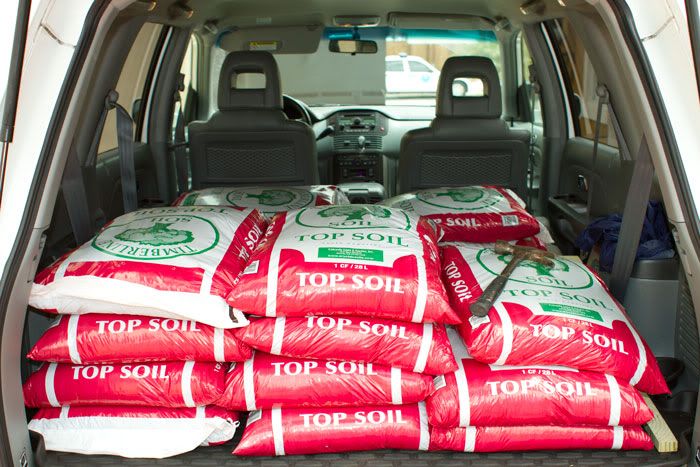
Total cost to build including dirt: $60 (not including seeds).
Instructions:
1. Find a nice sunny spot in your backyard that is decently far from any big trees or shrubs.
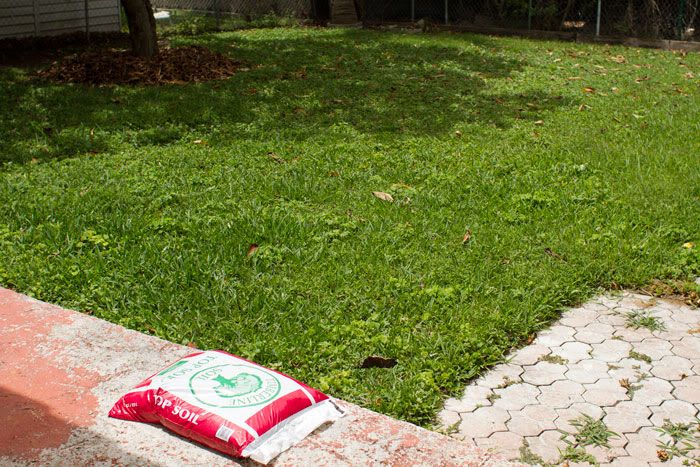
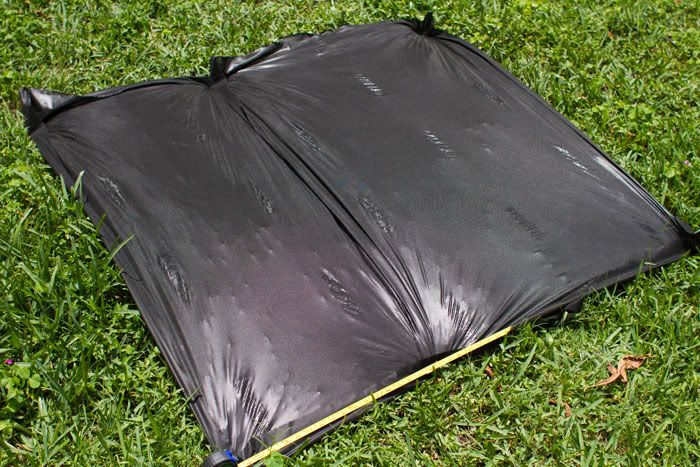
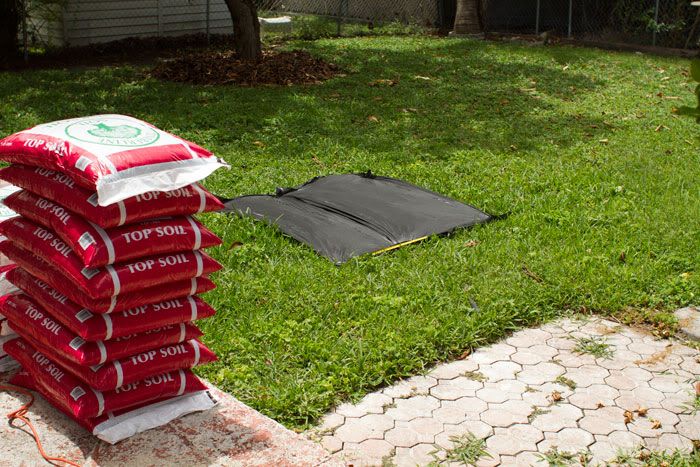
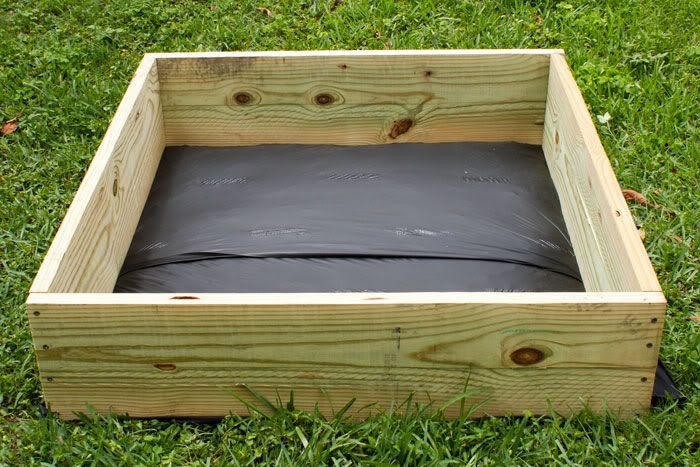
2. Lay out your weedblock fabric over the grass and stake it down so that the fabric is taut and as flat as possible. You do NOT need to dig out the area first as long as the ground is level. If it is not, then you should dig about 1-2" down into the ground and relevel the area where the garden will be to ensure proper drainage.
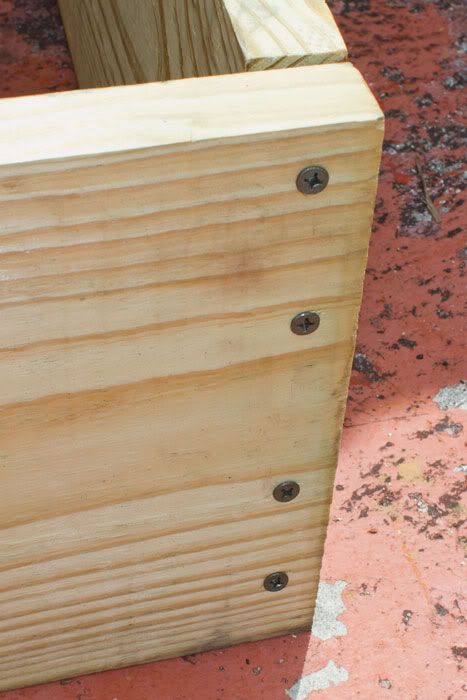
3. Construct your box by using the wood screws to screw together the pre-cut pieces of your wood. Remember to use a good drill and the proper screws for this. It is not critical that the boards be perfectly tight along the seams, but get them as tight as you can. Be sure to use a level to make sure that your garden box is level all the way around. You may need assistance during this part.
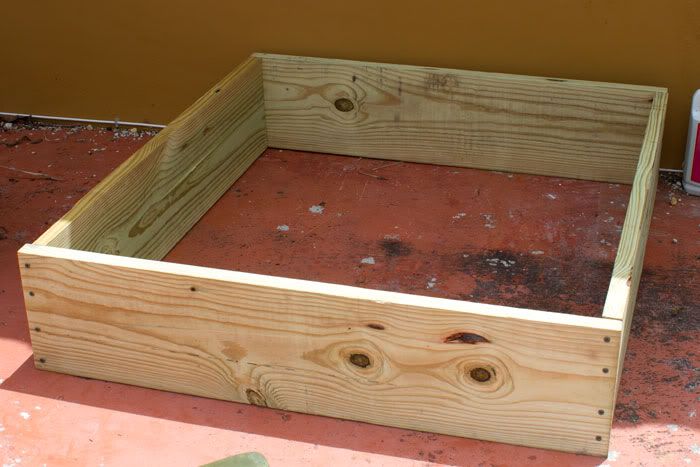
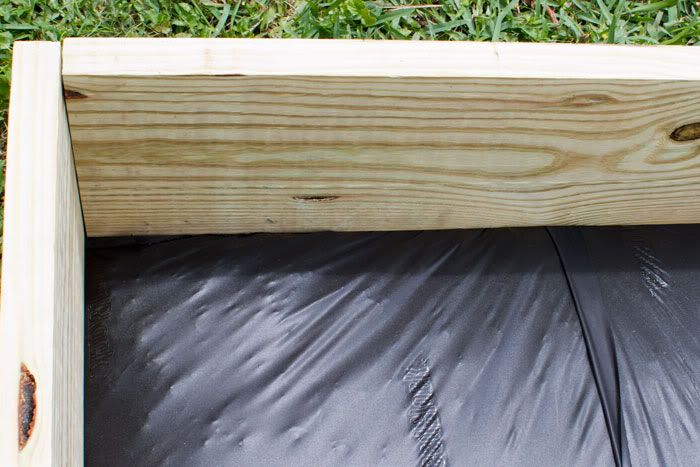
4. Lay box over your weedblock fabric careful not to tear the fabric and careful to be sure that there the fabric is tucked below the border of the box to prevent any weeds from coming up from underneath or establishing. This will also help prevent bugs from getting into your garden by digging below the border.
5. Fill with dirt and plant as per your instructions on the seed packet!
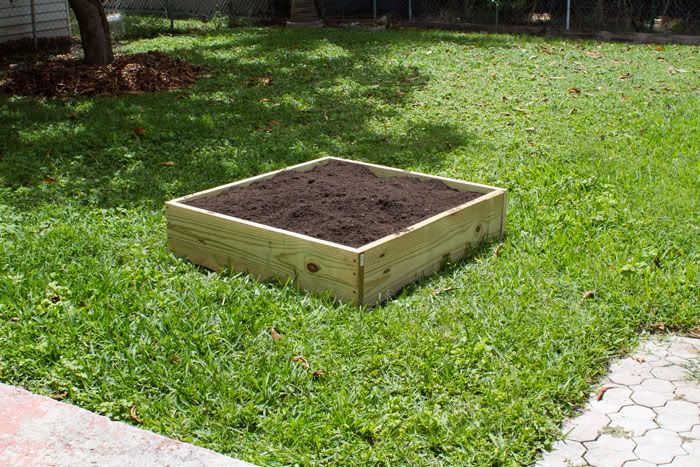
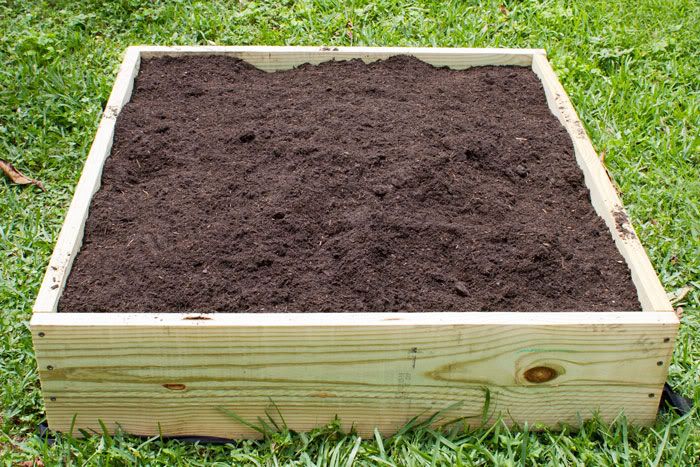
This makes a 4 ft x 4 ft planter box that is 1 foot deep. You can make it any size you want, but I recommend not making it wider than 4 ft so you can easily access the center of the box without having to step inside.
I plan on putting a border of pavers around mine to make it easier to dig and a little nicer to look at, but it gets the job done.
EDIT: sorry the pics got clipped, if you would like to see the full size images, look here: http://s1136.photobucket.com/albums/n487/ECNaturePhotos/
Not sure if Food and Nutrition is where to put this (or maybe Chit Chat), but I thought maybe growing food is relevant. Mods, if this is in the wrong area, please feel free to move it.
We have a small 1/4 acre back yard, and I really wanted to plant some veggies for the two of us to use, so I got the idea off the interwebz to build a raised vegetable garden instead of tilling up the thick clay dirt in our back yard.
For this project, I used:
1. A board of 2x12x16 pressure treated wood (cedar is great too but hard to find in some areas) cut into four 4-foot long lengths. Home depot did this for me so I didn't have to saw much except a small piece off the end. Be sure to check that the pressure treated wood does not contain copper arsenate (arsenic). Some woods still are treated with this, but most are not. Be sure to check if you're not sure.
2. Sixteen 3" EXTERIOR wood screws. Make sure they are EXTERIOR screws as interior ones will rust over time.
3. Weedblock fabric weed blocker
4. Eight weedblock stakes. Any flat tipped stake will do just fine also to hold the weedblock fabric taut and flat.
5. Strong electric screwdriver or drill with appropriately sized bit for the screws you buy. Drilling through thick pressure treated wood is not for a flimsy screwdriver so make sure you have a powerful enough one for the job.
6. Sixteen cubic feet of top soil (sixteen 1 cubic foot bags).

Total cost to build including dirt: $60 (not including seeds).
Instructions:
1. Find a nice sunny spot in your backyard that is decently far from any big trees or shrubs.

2. Lay out your weedblock fabric over the grass and stake it down so that the fabric is taut and as flat as possible. You do NOT need to dig out the area first as long as the ground is level. If it is not, then you should dig about 1-2" down into the ground and relevel the area where the garden will be to ensure proper drainage.


3. Construct your box by using the wood screws to screw together the pre-cut pieces of your wood. Remember to use a good drill and the proper screws for this. It is not critical that the boards be perfectly tight along the seams, but get them as tight as you can. Be sure to use a level to make sure that your garden box is level all the way around. You may need assistance during this part.


4. Lay box over your weedblock fabric careful not to tear the fabric and careful to be sure that there the fabric is tucked below the border of the box to prevent any weeds from coming up from underneath or establishing. This will also help prevent bugs from getting into your garden by digging below the border.


5. Fill with dirt and plant as per your instructions on the seed packet!


This makes a 4 ft x 4 ft planter box that is 1 foot deep. You can make it any size you want, but I recommend not making it wider than 4 ft so you can easily access the center of the box without having to step inside.
I plan on putting a border of pavers around mine to make it easier to dig and a little nicer to look at, but it gets the job done.
EDIT: sorry the pics got clipped, if you would like to see the full size images, look here: http://s1136.photobucket.com/albums/n487/ECNaturePhotos/
Not sure if Food and Nutrition is where to put this (or maybe Chit Chat), but I thought maybe growing food is relevant. Mods, if this is in the wrong area, please feel free to move it.
0
Replies
-
This looks great!! I think a paver area around it would look really nice, too.0
-
This looks great!! I think a paver area around it would look really nice, too.
I think so too. I'm thinking just some simple brick pavers would be nice. Please excuse our driveway and patio. It desperately needs to be resurfaced, but we haven't done it yet.0 -
That looks very nice! I need to do that..We have a HUGE yard but the soil is really bad (even weeds don't grow in the garden past a certain point..lol). Thanks for sharing!0
-
That's awesome. So have you decided on what you'll be planting this season. It is so much fun watching things grow. In Toronto, my dad has a garden also. We had to watch out for the deer, cats and rabbits which kept coming in, so my dad ended up putting chicken wire around the box.....yummy fresh vegetables coming up....great job :-)0
-
Nice project, but it’s cheaper to buy straw bales & grow a garden in them.0
-
That looks very nice! I need to do that..We have a HUGE yard but the soil is really bad (even weeds don't grow in the garden past a certain point..lol). Thanks for sharing!
Thanks! I was going to put out an 8x4 (twice as big), but I think for the two of us the 4x4 is a good size.
It's very easy to do, and only took about 4 hours of labor to get everything set up to plant!0 -
Nice project, but it’s cheaper to buy straw bales & grow a garden in them.
Straw bales are huge aren't they? As you can see, we have a small back yard. Using straw bales would take up a ton of space.
P.S. Finding straw bales in Miami isn't exactly easy to do either. It's not a bad idea if you have the space and access to them though.0 -
Bump to show my husband when he gets home from work. Thanks for sharing!0
-
That's awesome. So have you decided on what you'll be planting this season. It is so much fun watching things grow. In Toronto, my dad has a garden also. We had to watch out for the deer, cats and rabbits which kept coming in, so my dad ended up putting chicken wire around the box.....yummy fresh vegetables coming up....great job :-)
We do get stray cats in our yard often (there's a nursery right behind our house that they live in) so I might need to put up some fencing to keep them out.
I'm hoping to plant some watermelon, cucumbers, tomatoes, and pumpkin. I also got some beans.0 -
Looks great! We almost have to use raised beds here...the soil here is poor and there's a ton of caliche down just a very few inches. You need dynamite to dig through that stuff!0
-
Be very careful with treated lumber, it may contain Copper Arsenate (ARSENIC). Some lumber still contains this.0
-
I"m building one this summer too! I've been looking at 'square foot gardening' where you just add lattice pieces to mark out 1ft by 1ft squares. I have some of my seeds already starting inside, can't wait for the spring to come.0
-
Be very careful with treated lumber, it may contain Copper Arsenate (ARSENIC). Some lumber still contains this.
This particular lumber does not. I did check that first (and will add it to the list in my original post to be sure people know to find out).
Good point! Thanks!0 -
Bump!!0
-
Bump0
-
This is so great! Way to go.
I have a pot garden in our yard. Hehehe, not that kind of pot! We have tiny, 100% covered in concrete backyard (about 20ft x 15ft) but I love to grow things so decided to expand the pot collection when we moved here.
Currently I have had a nice dill harvest and basil, thyme, mint, and tomatoes growing out of control. I am always trying to pawn off the herbs on my neighbors. We moved in early summer last year, too late to start veggies but I am anxious to get some things going this year.
BTW - we live in extreme south texas, hence the prolific growth so early in the season.0 -
OP and I saw another post this morning with cut off photos. Even if you don't resize your photos, you can just right-click on the photo and choose "view image". You can see the whole thing. Just saying... in case there are others who don't know. :bigsmile:0
-
Great job! I have been working on my container veggie garden and go home everyday excited to see how much my plants have grown. It's such a good feeling to have a hobby that also leads to eating haha but at least it's healthy eating
 0
0 -
Just be careful to read up on the type of pressure treated wood that you are using first-some have bad chemicals that can seep into your garden/plants. I have raised beds and I started with 3 and am up to 6 now-makes gardening so much easier!0
-
No, they aren’t. They are less than 3’ tall & 12”X18” width & height. Google it…, a very fun, cheap way to grow veggies. I have some, but I also have a 50’X50’ garden. (I live off of my mine.)Nice project, but it’s cheaper to buy straw bales & grow a garden in them.
Straw bales are huge aren't they? As you can see, we have a small back yard. Using straw bales would take up a ton of space.
Find a ranch or famer who has last year’s straw…., even in FL.
ps.., you can also dehydrate veggies as snack treats too.0 -
I just went to a gardening class. They said that for raised beds you need 1/3 peat moss, 1/3 vermicullite, and 1/3 compost. The guys said that if you have any problems growing anything or problems with bugs it's because your soil is not good enough. You might want to consider adding some compost (a mixture of different kinds is best) to that top soil. Just a suggestion ...
I'm going to be starting my beds soon too - good luck with yours!!0 -
for the watermelons and pumpkins, build a "hill" in your backyard and plant at the top so they can grow down the hill. cucumbers and beans, you can put in posts or arches and let them grow up and around. cucumbers can also be planted in the hill like the pumpkins. any kind of melon can.
i transplanted my strawberries into a bigger box yesterday :-) i have raised beds too, but the set up is a bit different. i love gardening and growing my own food.
cherry tomatoes, peas, and raspberries are my favorites because you can just walk outside, pick and eat! we have chickens for fresh eggs as well!!That's awesome. So have you decided on what you'll be planting this season. It is so much fun watching things grow. In Toronto, my dad has a garden also. We had to watch out for the deer, cats and rabbits which kept coming in, so my dad ended up putting chicken wire around the box.....yummy fresh vegetables coming up....great job :-)
We do get stray cats in our yard often (there's a nursery right behind our house that they live in) so I might need to put up some fencing to keep them out.
I'm hoping to plant some watermelon, cucumbers, tomatoes, and pumpkin. I also got some beans.0 -
I just went to a gardening class. They said that for raised beds you need 1/3 peat moss, 1/3 vermicullite, and 1/3 compost. The guys said that if you have any problems growing anything or problems with bugs it's because your soil is not good enough. You might want to consider adding some compost (a mixture of different kinds is best) to that top soil. Just a suggestion ...
I'm going to be starting my beds soon too - good luck with yours!!
That's a good idea. I've usually just grown in top soil and added a bit of fertilizer to it before planting. That works decently well. I'm not going for prize-winning veggies, just tasty stuff my husband and I can eat. It's good to improve though as much as possible. I'm fairly new to gardening.0 -
quality compost is a MUST!! you can make your own in your own backyard. save grass clippings, leaves, food from the kitchen...... pile it up and turn every once in a while. it's great for a garden!!!I just went to a gardening class. They said that for raised beds you need 1/3 peat moss, 1/3 vermicullite, and 1/3 compost. The guys said that if you have any problems growing anything or problems with bugs it's because your soil is not good enough. You might want to consider adding some compost (a mixture of different kinds is best) to that top soil. Just a suggestion ...
I'm going to be starting my beds soon too - good luck with yours!!0 -
Great job! I have been working on my container veggie garden and go home everyday excited to see how much my plants have grown. It's such a good feeling to have a hobby that also leads to eating haha but at least it's healthy eating

LOL for sure! I have blueberries and big boy tomatoes in pots already. Good stuff! If this goes well, I may put out some peppers in another box later.0 -
Bump! I want to remember this ...thanks.0
-
This is so great! Way to go.
I have a pot garden in our yard. Hehehe, not that kind of pot! We have tiny, 100% covered in concrete backyard (about 20ft x 15ft) but I love to grow things so decided to expand the pot collection when we moved here.
Currently I have had a nice dill harvest and basil, thyme, mint, and tomatoes growing out of control. I am always trying to pawn off the herbs on my neighbors. We moved in early summer last year, too late to start veggies but I am anxious to get some things going this year.
BTW - we live in extreme south texas, hence the prolific growth so early in the season.
I live in Miami, so we can grow pretty much year round with some stuff doing better in winter (broccoli, cucumbers) than summer.
I'm excited! I miss having home-grown veggies.0
This discussion has been closed.
Categories
- All Categories
- 1.4M Health, Wellness and Goals
- 396.5K Introduce Yourself
- 44.2K Getting Started
- 260.8K Health and Weight Loss
- 176.3K Food and Nutrition
- 47.6K Recipes
- 232.8K Fitness and Exercise
- 449 Sleep, Mindfulness and Overall Wellness
- 6.5K Goal: Maintaining Weight
- 8.6K Goal: Gaining Weight and Body Building
- 153.3K Motivation and Support
- 8.3K Challenges
- 1.3K Debate Club
- 96.5K Chit-Chat
- 2.6K Fun and Games
- 4.5K MyFitnessPal Information
- 16 News and Announcements
- 18 MyFitnessPal Academy
- 1.4K Feature Suggestions and Ideas
- 3K MyFitnessPal Tech Support Questions


