Best Low Carb Bread (No flour was used)
Options

Poobah1972
Posts: 943 Member
Okay figured I'd make another post since my last title was to long winded and apparently no-one saw it, yet were acquiring about the recipe in another thread. Plus I tweaked the recipe to reflect correct macro's for 17 slices which this accurately produces in a 5 x 9 loaf pan.
The best Low Carb Bread EVER!!!
Details:
It tastes like bread, chews like bread, tears like bread, feels like bread, and even toasts great while remaining soft on the inside. And it sure as heck smells like bread while it’s baking and afterwards. The flavor reminds me of a white bread crossed with a wheat bread and perhaps a bit of rye bread. Basically It's real bread and uses yeast to rise.
This recipe was created by Diedre, and can be found by googling "Diedra for real low carb bread."
Best of all, the whole loaf comes in at about 29 net carbs, meaning there are about 1.7 net carbs per slice (17 slices per loaf).
Recipe:
Instructions for Mixer
Pizza Crust Recipe
To make it, you start with the dough listed above, and then:
Nutritional Information
Whole Loaf
1610 Calories
Total Fat 66 Grams
Total Carbohydrates 97 Grams
Dietary Fiber 68 Grams
NET Carbs 29 Grams
Protein 185 grams
Per Slice (17 per Loaf)
94.70 Calories
Total Fat 3.88 Grams
Total Carbohydrates 5.71 Grams
Dietary Fiber 4.00 Grams
NET Carbs 1.70 Grams
Protein 10.88 Gram
And in case anyone was wondering, I pre-slice the entire loaf and double warp it and freeze it. It freezes great, and doesn't stick to each other, so need to anything special. Just Cut it, throw it in a bag, and I double bag just for safe measure.
As for bread machines... That's what I've been using, and I've only made my second loaf just last night. I'm still trying to figure out the best way to do this... And perhaps it turns out better in a loaf pan as per instructions below. I've been shaping my loaf by hand after the initial mixing phase, but I find the beat down phases throw the entire loaf out of wack again, so I also end up shaping it again after the final beat down. But I find I always loose a lot of volume. So on my next try, I'm just going to remove my paddles after the initial mix, then set my rise time for a total of about 1.5 to 2 hours, and leave the loaf undisturbed the whole time. I think I can get significantly higher rise, however if I don't the loaf is already fantastic. So I guess I'll just have to see how that next loaf goes.
Pictures

Note: My boss and co-workers daughter are Type 1 Diabetics, so they each get half a loaf today.
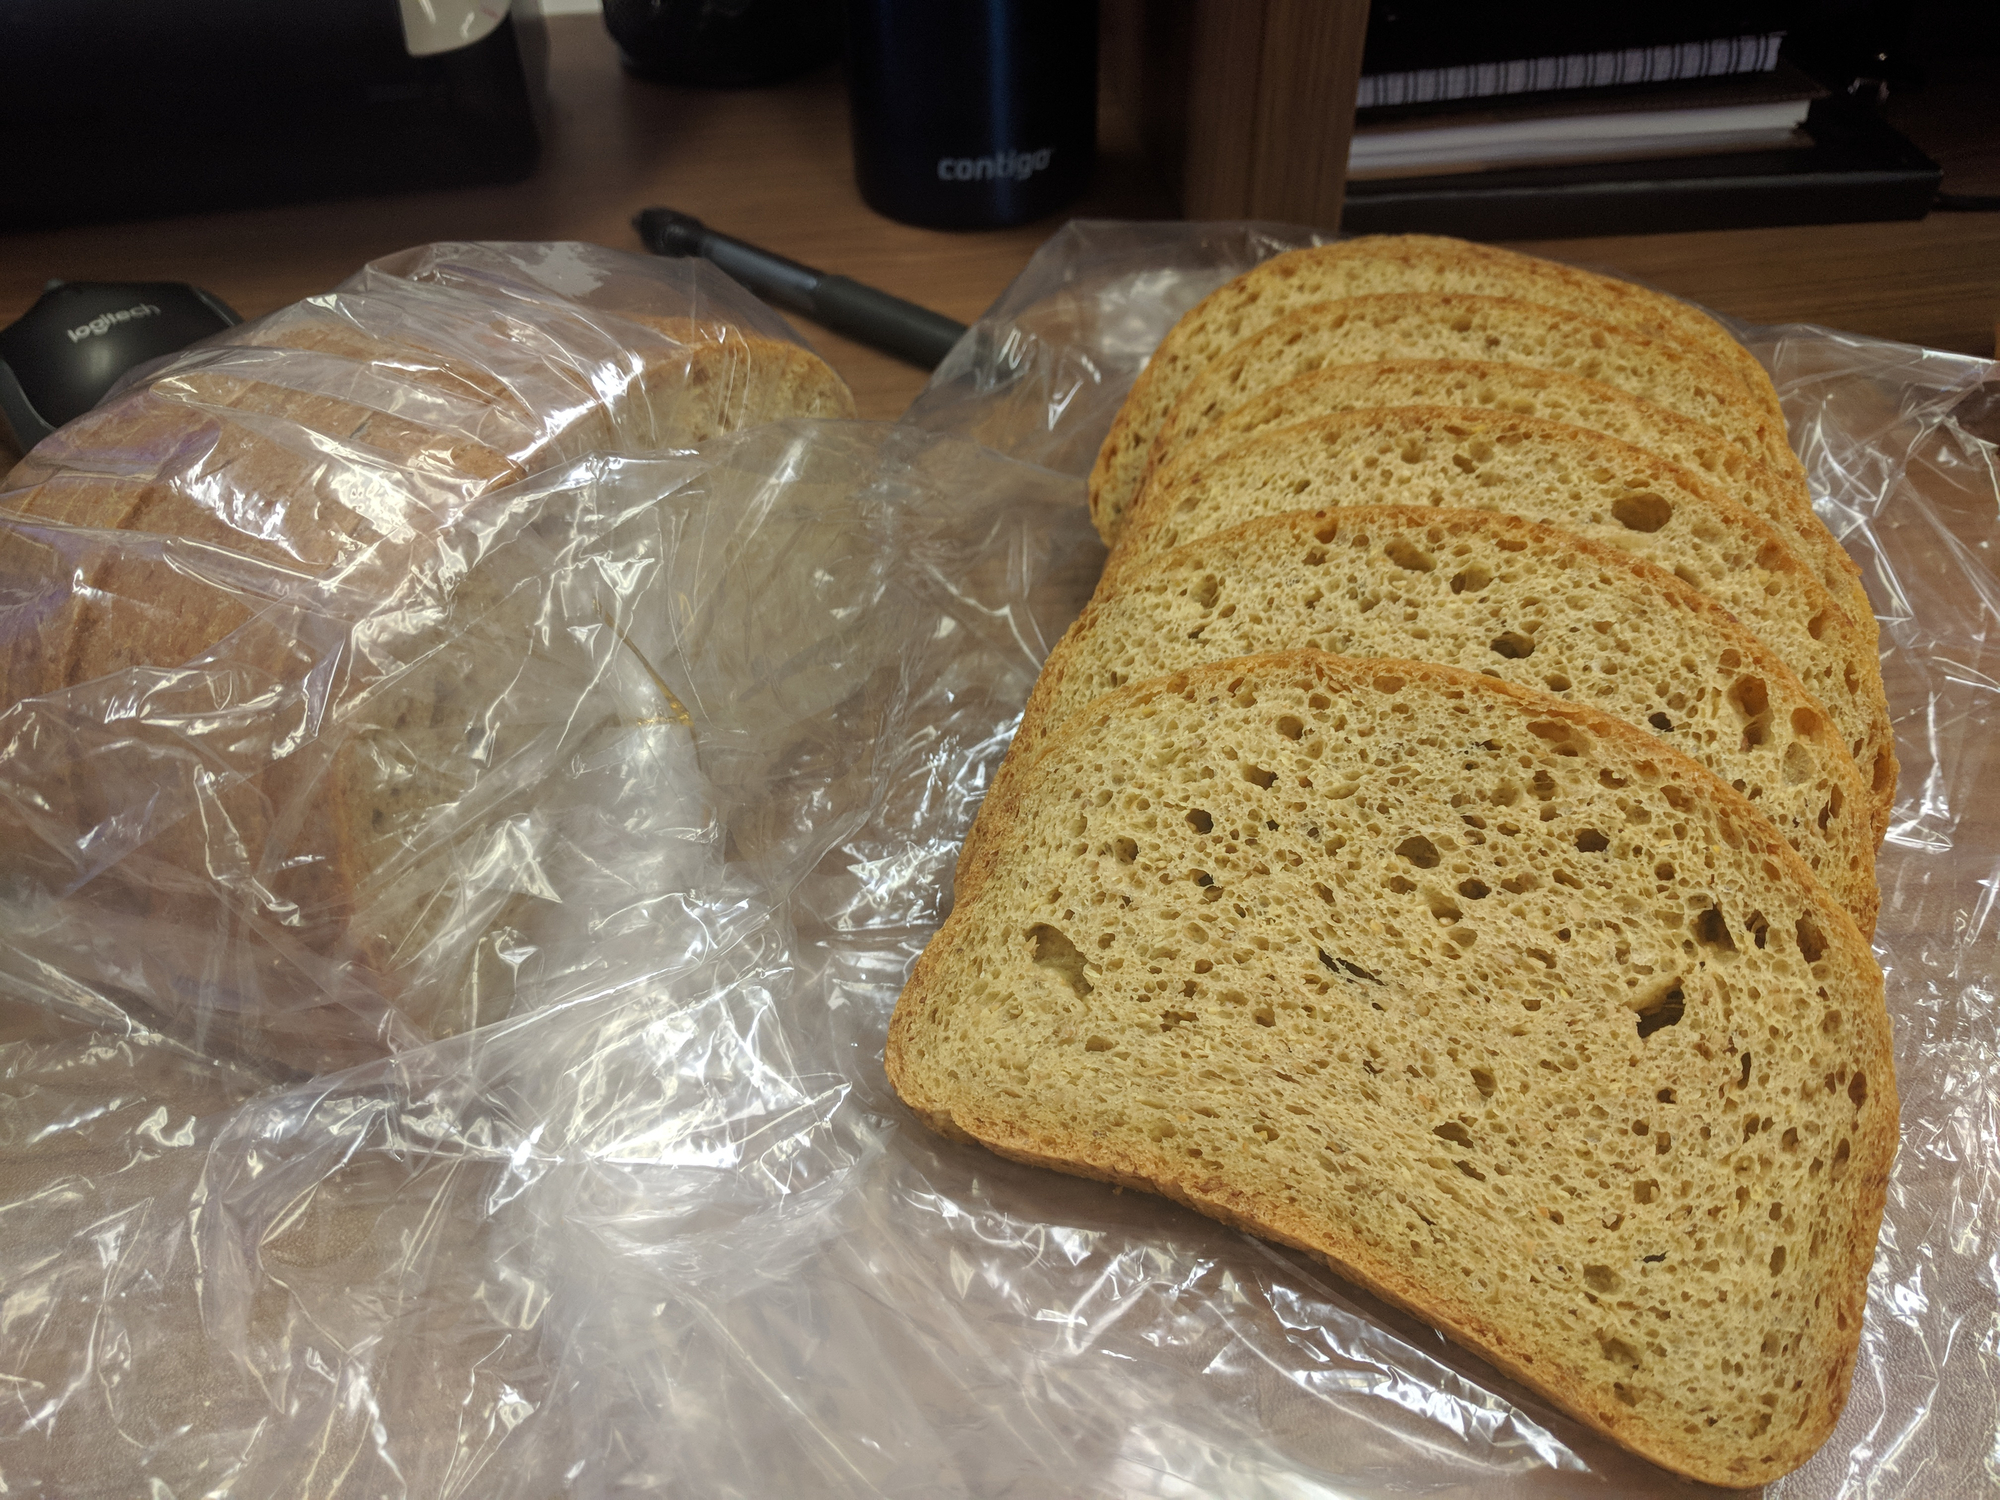

NOTE: Yes that's a Trump Head Stress Ball - Highly recommended. Lol
IF you've been low-carbing for awhile, or are missing bread you really owe it to yourself to try this recipe. I promise it won't disappoint.
As for ingredients, I was able to get most of the ingredients from Amazon, with exception of golden flax seed meal, which is more often then not available at a local health or natural foods store. The only expensive side of this reciepe is the 100% wheat gluten as the Bob's red mill ~600 is only enough for 3 loafs, where as the rest of the ingredients go quite far. However even with that in mind, the cost is 2-3 times less then that of a far inferior in quality, nutrients and overall size of say a commercial product such as "Great Low Carb Bread Company" which I use to think was a god send.
So order the ingredients and get baking.
The best Low Carb Bread EVER!!!
Details:
It tastes like bread, chews like bread, tears like bread, feels like bread, and even toasts great while remaining soft on the inside. And it sure as heck smells like bread while it’s baking and afterwards. The flavor reminds me of a white bread crossed with a wheat bread and perhaps a bit of rye bread. Basically It's real bread and uses yeast to rise.
This recipe was created by Diedre, and can be found by googling "Diedra for real low carb bread."
Best of all, the whole loaf comes in at about 29 net carbs, meaning there are about 1.7 net carbs per slice (17 slices per loaf).
Recipe:
- 1 cup of water - 246 g
- 1 Tbsp.Saf Instant Yeast ( 11 g )
- 1 tsp of real honey ( 7 g ) (or Substitute 1 tsp of sugar. (Note the yeast will eat this during rise and isn’t counted in the carb count. And if you want to count it, it only add’s 0.41 carbs per slice)
- 2 eggs, slightly beaten, room temperature.
- 1/2 Cup Oat Fiber - 38 g
- 2/3 Cup Ground Golden Flax Meal - 84 g
- 1 1/4 Cup Vital Wheat Gluten - 192 g
- 1/2 tsp of Xanthum Gum - 1 g
- 1 tsp of salt - 6 g
- 2 Tbsp. of softened butter - 28 g
Instructions for Mixer
- Microwave 1 cup of water for about 45 seconds until it is 100-110 °F
- Pour your honey into the water and mix it around so it dissolves
- Add your yeast into the honey water and stir it around
- Add in your remaining ingredients in the order listed above
- Mix for about Update: I've noticed that kneading it for longer (upwards of 15 minutes) results in a better dough. The end result shouldn't be shaggy looking, and it should bounce back a bit when you push on it with your finger.
- Put into a loaf pan, cover with oven-safe saran wrap that has been sprayed with non-stick spray
- Microwave 2 cups of water until it begins to boil (about 2 minutes). Keep this in the microwave to make it warm and humid.
- Place loaf in the microwave BUT DO NOT TURN IT ON. Leave it in there for Update: 2-3 hours. to allow the dough to rise (You can also use the oven on low. But, again, you are not microwaving the dough -- you're just putting the dough in the microwave while it is off).
- Put in oven for 20-25 minutes at 375 degrees.
Pizza Crust Recipe
To make it, you start with the dough listed above, and then:
- Use some oat fiber on your counter (to keep the dough from sticking)
- Roll it out with a rolling pin like you would do with any other dough
- Scatter some coarse corn meal on a wooden pizza peel (one of those big spatula things)
- Pre-heat an oven to 550 * F with a pizza stone in it
- Brush the crust with olive oil, add toppings, then slide it into the oven with a jerk of the pizza peel onto the stone and bake for 10 to 12 minutes (until crust is brown and cheese is bubbly).
Nutritional Information
Whole Loaf
1610 Calories
Total Fat 66 Grams
Total Carbohydrates 97 Grams
Dietary Fiber 68 Grams
NET Carbs 29 Grams
Protein 185 grams
Per Slice (17 per Loaf)
94.70 Calories
Total Fat 3.88 Grams
Total Carbohydrates 5.71 Grams
Dietary Fiber 4.00 Grams
NET Carbs 1.70 Grams
Protein 10.88 Gram
And in case anyone was wondering, I pre-slice the entire loaf and double warp it and freeze it. It freezes great, and doesn't stick to each other, so need to anything special. Just Cut it, throw it in a bag, and I double bag just for safe measure.
As for bread machines... That's what I've been using, and I've only made my second loaf just last night. I'm still trying to figure out the best way to do this... And perhaps it turns out better in a loaf pan as per instructions below. I've been shaping my loaf by hand after the initial mixing phase, but I find the beat down phases throw the entire loaf out of wack again, so I also end up shaping it again after the final beat down. But I find I always loose a lot of volume. So on my next try, I'm just going to remove my paddles after the initial mix, then set my rise time for a total of about 1.5 to 2 hours, and leave the loaf undisturbed the whole time. I think I can get significantly higher rise, however if I don't the loaf is already fantastic. So I guess I'll just have to see how that next loaf goes.
Pictures
Note: My boss and co-workers daughter are Type 1 Diabetics, so they each get half a loaf today.
NOTE: Yes that's a Trump Head Stress Ball - Highly recommended. Lol
IF you've been low-carbing for awhile, or are missing bread you really owe it to yourself to try this recipe. I promise it won't disappoint.
As for ingredients, I was able to get most of the ingredients from Amazon, with exception of golden flax seed meal, which is more often then not available at a local health or natural foods store. The only expensive side of this reciepe is the 100% wheat gluten as the Bob's red mill ~600 is only enough for 3 loafs, where as the rest of the ingredients go quite far. However even with that in mind, the cost is 2-3 times less then that of a far inferior in quality, nutrients and overall size of say a commercial product such as "Great Low Carb Bread Company" which I use to think was a god send.
So order the ingredients and get baking.
19
Replies
-
Wow....where do you get some of the ingredients ....like the oat fiber, wheat gluten and xanthum gum? Looks great!1
-
Wow....where do you get some of the ingredients ....like the oat fiber, wheat gluten and xanthum gum? Looks great!
Ok.... I actually was able to find the ingredients at my local health food store. I am going to make this in my bread machine. I'll post and let you know how it was. Sure hope it tastes as good as it looks. Stay tuned........
If you have any more tips on making in Bread Machine please let me know.
Thank you!4 -
Wow....where do you get some of the ingredients ....like the oat fiber, wheat gluten and xanthum gum? Looks great!
Ok.... I actually was able to find the ingredients at my local health food store. I am going to make this in my bread machine. I'll post and let you know how it was. Sure hope it tastes as good as it looks. Stay tuned........
If you have any more tips on making in Bread Machine please let me know.
Thank you!
Hah!, I'm excited your trying it.
I don't have a lot of bread machine experience yet... However this produces are rather stretchy elastic type doe. (compared to the white loaf I made for guests last week.)
With that in mind, depending on your bread machine you may need to shape the loaf either right after the initial kneading or after the last punch down (which i did on the first two loafs including the one pictured above). This is probably more important on a full size loaf maker with 2 paddles. As I find even the punch down phase will pull the doe to one side or another (causing sky-slope bread). When I shape after the last punch down, i also pull the paddles so the holes are tiny.. but that's up to you.
Another suggestion... I've read that a long kneading time benefits the gluten. But it works fine with the standard 20 minutes so don't sweat it.
This time round (as I type this)... I'm trying something different. I'm giving it a 30 minute knead, then 30 minute rise. Then I'm pulling the paddles, shaping it, and letting it rise unmolested for 2 hours before making. I'm hoping I can get a taller loaf... But who know's maybe it's a bad idea. I won't know till i try it.
Oh I'm sure you know wet ingredients first (sugar in water)... then dry ingredients and yeast last.
Regardless it turned out amazing on my first 2 tries... So I would say the only important thing is shaping it before the final rise.2 -
FYI.... I wrote TSP of sugar... But I'm using 7 grams the same as the honey. Shouldn't be a deal breaker though.1
-
That looks fantastic! Guess I am baking bread this weekend!1
-
Ok....let me see if I got this right. With my machine (for white bread). There is a quick course and a basic course. With the Basic Course there are 3 risings, with Quick 2 risings. So do I reshape the dough right before the last rising? My machine (Zojirushi) has two paddles. Will it be sticky? Is it hard to reshape? I'm counting on some really delicious bread now.......0
-
Ok....let me see if I got this right. With my machine (for white bread). There is a quick course and a basic course. With the Basic Course there are 3 risings, with Quick 2 risings. So do I reshape the dough right before the last rising? My machine (Zojirushi) has two paddles. Will it be sticky? Is it hard to reshape? I'm counting on some really delicious bread now.......
No matter what you do, it will turn out that I'm sure of... How much it rises is the question. My loaf last night turned out fantastic, nice and high... When I saw it, I was excited like a kid with a new toy. *yeah, i had to laugh at myself*. I thought maybe it would have huge bubbles in it.. But Nope, it's Perfect. Lighter and Fluffier. YEah!
Use the basic white... Based on last nights loaf, I would recommend shaping it 20 to 30 min after mixing (or when the first rise is over). Just pull it out and manually knead and shape it make it into an equal shape that fits your pan. Keep the lid closed as your doing this to conserve heat. Before you put it back, in go ahead and pull the paddles and then drop that doe in there and push it down. (feel free to press it in the middle and push toward the edges etc..
This loaf seems to lose its steam in terms of rising by the third rise. In fact my current loaf rised to it's full size in only 40-50 minutes after I shaped it, but I let it sit there for a total of 2 hours. Way over kill I think... 50 minutes would of been about same and would be about the time you would have left on Basic white rise 2 and 3 combined. With the paddles pulled, no punch down will occur. So you should be golden.
I do think if you go to a custom loaf setting sometime in the future... The Doe probably does benefit from a longer kneading cycle... 30-35 minutes. But no reason to fret about it.
New picks of my Big Boy loaf. lol


 0
0 -
MichelleMcKeeRN wrote: »That looks fantastic! Guess I am baking bread this weekend!
You won't regret it! Keep me posted.... *exciting*0 -
Based on the loaf above... Here's what I think are the proper Bread Maker instructions.
- Prior to putting all your ingredients in the pan. Fill your pan to the top with your hottest tap water, and let the pan warm up, while you pull out all your ingredient, measuring cup, measuring spoons, scale etc and so forth. (3 minutes or more).
- Dump the hot water then immediately start adding your ingredients to the pan.
- First thing in is 1 cup of warm water with your ~7 grams of sugar or honey (a little more sugar may give yeast more fuel for rising not sure).
- Then the eggs (slightly broken), followed by, Oat Fiber, Golden Flax Meal, Xanthum Gum, salt and wheat Gluten.
- I usually portion my butter in 4 piece and drop them near the corners.
- Yeast is last right in the middle and high and dry.
Setting up your 2 paddle bread machine course. (single paddles are probably less fussy, and may not need to be shaped, but the timings below should be the same.)
Rest Off, as you heated the pan, and the water used is warm.
Shape OFF, as I think it's best not to shape it until after the first rise.
Knead - 30-35 minutes - Longer knead times seems to improve the doe quality.
Rise 1 - 20-30 minutes
Shape - Now that the first rise is complete, open the lid, remove the doe and close the lid. The doe is very elastic and I just use my hands to mush it around and squeeze it working out all the bubbles folding it in on itself and working it into a cylinder shape, squeezing and rolling it in the middle to elongate it. The doe doesn't stick to your hands, and no oil anything seems to be required. You could work it on a cutting board if you wish, doesn't really matter.
Once you got it close to the right length of your bread machine, pop the lid back open, Yank out the paddles, (they will be slippery so perhaps a bit of paper towel will give you some grip. Then plunk that doe back in, and use your hands to press it down, and work it from the center to the edges until it looks happy. Note it doesn't have to touch every corner or the sides, as it will rise and fill in the blanks. Close the lid.
Rise 2 - 30 minutes - Now that the paddles are pulled the punch down phase won't effect the bread during Rise 2 and 3
Rise 3 - 30 minutes
Bake 1 hour
If all goes well, you should have bread as per pictures above.
And here's a picture of the bottom of the same loaf with Paddles pulled so you can see how unobtrusive these holes are. One trick I should mention, when removing the bread from the pan, I simply turn it over while it's still hot and then use a blunt pointy object like the end of a wooden spoon to spin the paddle spinners until they move around sort of freely. the bread will come out much easier now, and not tear a big hole.
Now see how long you can wait before you have a slice.0 -
My Theory on the rising of this bread.
The first 2 loaves I made, as per my initial post didn't rise to much after I shaped it... So the bread looked more like a Rye bread, and was a little denser. Still great bread, and in some cases you might even prefer it that way. In both those cases, I shaped and handled the bread just before the last Rise. I did shape it gingerly though, so perhaps if I squeezed it hard and worked the bubbles out, it may have risen better? But what I think actually happened, is the yeast was all done eating what little sugar and carbs were in this bread, so there probably wasn't much fuel left over to continue rising, thus I got the stunted loaves. This is pretty good proof that you don't need to count honey/sugar carbs.
So as per my post right above this one... I think its best to let it have it's first rise, then really man handle that doe, stretch it, squeeze it, and roll it in your hands pressing hard in the middle as you do. And when you put it back in the pan, put any seems you may have towards the bottom, and it should rise like a shining star before it bakes.
That's my thoughts after loaf 3. lol2 -
I have only made bread by hand but I have made a lot of it. I am planning on trying this by hand the same way.
For those of you that can’t wait to taste your bread, there is a trick. Before baking, grab a handful of dough and shape into the size of a roll. It will bake in slightly less time and you can eat your little roll hot from the oven.3 -
MichelleMcKeeRN wrote: »I have only made bread by hand but I have made a lot of it. I am planning on trying this by hand the same way.
For those of you that can’t wait to taste your bread, there is a trick. Before baking, grab a handful of dough and shape into the size of a roll. It will bake in slightly less time and you can eat your little roll hot from the oven.
Sounds great... Looking at it through the window as it is Kneading... I suspect it will be somewhat of a sticky mess early on, as it will definitely take longer for the doe to fully integrate compared to a regular loaf as the gluten slowly builds it character and becomes more of a smooth stretchy mass/blob. So be prepared for a longer work out then normal.
0 -
Oh and how happy does this bread make me?

Now that's a nice Top Hat Mr. Eggs & Bacon.
7 -
Thank you so much for all your feedback! I cannot wait to try it and report back!1
-
Thank you so much for all your feedback! I cannot wait to try it and report back!
You are very welcome... I feel it's my duty to share this with anyone that has ever had any experience with low carbing and/or diabetes. This recipe is truly miraculous, at least where bread is concerned.
I've condensed the entire recipe with including both Mixer and Bread Machine instruction's into a PDF for easy printing. Unfortunately, I don't think i can link it here... Doh!
2 -
Definitely want to try this bread. And that stress ball 🤣😂5
-
Have at it, but be careful... He's a biter.

 6
6 -
The verdict is in! Deeeeeeliiiiiish! It was very, very good! I made pannini sandwiches using it. I was hoping it would have risen a little higher like yours did. Mine did not rise as much as yours did but it was still airy and chewy. Maybe my machine is larger than yours? Mine makes a 2lb loaf. l have two paddles in mine. Thank you for all the details in making this. Especially taking out the paddles and reshaping it after first rise. Have you used it yet making pizza crust? I want to try it for that as we eat a lot of pizza and i always make my dough in the bread machine. I will make this again! I imagine this is higher in protein too with the vital wheat gluten.
I did use sugar rather than honey. I did not mix honey, yeast and water since I followed my machines advice and put yeast on top along with sugar and salt (keep the salt away from the sugar).
I measured everything out using a scale. Thanks for sharing! I can't wait to make pizza with it!3 -
Wooohooo Glad to hear you liked it as much as me. My first 2 loafs didn't rise so much, so who knows by your third you might get better results?
Did you muscle into that "shaping" and really knead it together pressing all that glob firmly together? This puts the yeast back in contact with sugar calapsing the first round of bubbles which supposedly assists it in getting a better 2nd rise? I think I was a bit guilty of that at first.
If the above doesn't work, you can try cutting short the first rise by 10 minutes... Perhaps your burning throught that sugar, not leaving much in the tank for rise 2?
Or, you could perhaps double up on the sugar cause if the options above don't help then I'm assuming the yeast is going hungry..... worst case 7 grams extra sugar doesn't really change much and at least trying that once will give you a clue to whats happening?
As for the bread machine.... After my first 2 loaves I was questioning whether this was a 1.5 pound recipe or a 2 pound recipe just like you. I am using a 2lb Zojirushi. Regardless of rise, I would say it's delishious and I think the smaller rise produces a yummier toast that doesn't dry out.
Haven't tried Pizza yet, but we will for sure... It should work great, let me know how that goes.
This bread is high in Protien, Fibre and all round good for you... These macro's are per measured ingredients all punched into Myfitnesspal Recipe maker.
Per Slice (17 per Loaf)
94.70 Calories
Total Fat 3.88 Grams
Total Carbohydrates 5.71 Grams
Dietary Fiber 4.00 Grams
NET Carbs 1.70 Grams
Protein 10.88 Gram2 -
Confirmed... Makes a pretty mean grilled cheese (I shared with my fiancé).


6 -
Thanks again for your comments. No i really did not " muscle into that "shaping" and really knead it together pressing all that glob firmly together? This puts the yeast back in contact with sugar calapsing the first round of bubbles which supposedly assists it in getting a better 2nd rise? I think I was a bit guilty of that at first."
Next time I will do that for sure. I"m still happy at the way it turned out. Having it again for dinner tonight!
I like your bread slicing machine? Does that fold up? I have very limited space in my kitchen but looks like a nice gadget.0 -
I love it too... It's actually bread. (never thought it would be possible).
As for the cutter, it folds up somewhat.
I found it on amazon, after spend a good bit of time looking for the right one. It's on the expensive side as far as they go, it's seems head and shoulders over the competition.
The listing on Amazon by searching Fshopping foldable toast bread slicer bread uniform cutting2 -
Thanks so much!1
-
I have one of those fold-up bread slicer guides as well. It was a new-in-box thrift store find. LOVE it!1
-
CAN YOU MAKE THIS BREAD IN THE OVEN, i DON'T HAVE A BREAD MACHINE.
 THANK YOU. JEAN 0
 -
CAN YOU MAKE THIS BREAD IN THE OVEN, i DON'T HAVE A BREAD MACHINE. THANK YOU. JEAN
Yes the directions on the first post is actually using a mixer and baking in a 5x9 bread pan. You can even make it by hand if you wish and bake in the oven. I've made 4 loafs so far, and everyone of them has been delicious, so just go for it! And I'd be happy to answer any questions you may have.
Cheers!1 -
Thank you Poobah, where will I find the first post, what's the date on it please. Thank you.0
-
The very first post in this thread...
https://community.myfitnesspal.com/en/discussion/10825652/best-low-carb-bread-no-flour-was-used/p1
Your welcome.0 -
I am so making this! I live way out in the middle of nowhere, nearest grocery store is an hour away so it will have to wait until we go next Wednesday, I am excited though! Thank you for posting this!0
-
I am so making this! I live way out in the middle of nowhere, nearest grocery store is an hour away so it will have to wait until we go next Wednesday, I am excited though! Thank you for posting this!
Fantastic... Some items may be hard to find in the grocery store, depends on the grocery store I guess. I'd imagine most groceries store would at least some of these items in the health food section. Otherwise you should find most everything at an actual Natural Foods/Health food store. But when in doubt amazon seems to have everything with exception of Golden Flax seed meal for some reason (which is at every health food store).
Good Luck!2


This discussion has been closed.
Categories
- All Categories
- 1.4M Health, Wellness and Goals
- 396.3K Introduce Yourself
- 44.1K Getting Started
- 260.8K Health and Weight Loss
- 176.3K Food and Nutrition
- 47.6K Recipes
- 232.8K Fitness and Exercise
- 448 Sleep, Mindfulness and Overall Wellness
- 6.5K Goal: Maintaining Weight
- 8.6K Goal: Gaining Weight and Body Building
- 153.3K Motivation and Support
- 8.3K Challenges
- 1.3K Debate Club
- 96.4K Chit-Chat
- 2.5K Fun and Games
- 4.4K MyFitnessPal Information
- 16 News and Announcements
- 18 MyFitnessPal Academy
- 1.4K Feature Suggestions and Ideas
- 3K MyFitnessPal Tech Support Questions